Cardigang Knit Kit review
I knitted a Cardigang kit, here’s how it went.
Earlier this year, I came across the awesome knit kit brand Cardigang, established by best mates Kat and Morgan during Melbourne’s lockdown. As two rookies who got into knitting during 2020, the pair quickly learnt their way around a pair of knitting needles and developed a super cool business creating knit kits for other beginners like them. You can read more about them in this article I wrote for Urban List.
When my birthday rolled around in September, my lovely dad bought me the Shannon Cardi kit in the Red Red Wine colour. I went for a size 2 (AU 10-12) because I prefer an oversized, relaxed fit. The Shannon is a beginner level kit, using only two stitch types. On the website they say it should take around 12-14 hours to complete—this was pretty accurate in my experience.

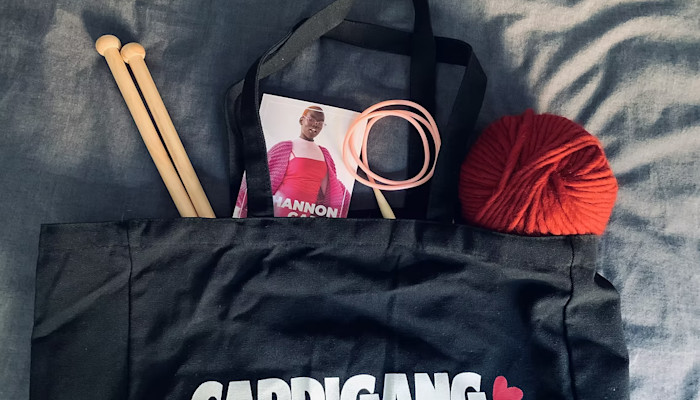
What’s in the kit?
The knitting pattern (which is super easy to follow)
Wool (100% Australian Merino)
A Cardigang tote bag (perfect to store your project in)
Lots of paper confetti and a packet of fruit tingles!
QR codes for tutorial videos at each stage of the knit
Not included:
Knitting needles (I got the needles as an extra for $10 because I didn’t have any, you’ll need a set of 10mm circular needles and 15mm needles)
Starting the knit
I’ve been a crochet crafter for a few years, but knitting has never been my strongest skill—I always found the needles too fiddly. I won’t lie, it took me several attempts before I had the tension right for my first few rows. I watched the video demonstrating casting on, and the tutorials on the knit and purl stitches, but it took me a while to get into the rhythm of alternating between the two. Next time, I think I’ll spend a bit more time just practising the stitches before I start the pattern—I was too keen to jump right in!

Knitting the sections
The knit is done in sections—the back, two front panels, and the sleeves. Doing them in this order worked well for me, because the complexity gradually built up with each section. The back gave me the room to settle into the rhythm of knit stitches, then the front panels could be smashed out super quickly, and then by the time it came to the sleeves, I felt like a pro and could focus less on how to knit the stitches themselves and more on dropping stitches to follow the pattern and create the shape of the sleeve.

Sewing it all together
Once all the sections were completed, I watched the tutorial on stitching it all together. This was probably the hardest part for me, just because I struggled to see which loop I should be sewing through on either side of the seam. But once I got the hang of it, it all fell into place. I wove in all the loose ends and have been wearing the cardi ever since!
Troubleshooting
The Cardigang tutorials were great for learning how to do each stitch and each part of the process, but they didn’t have any troubleshooting videos. For example, when I dropped a stitch or did a purl instead of a knit stitch, I had no idea how to fix it (cue panic mode). Luckily, I have a mum who’s a knitting aficionado, so she was able to help me fix my mistakes. But this is definitely an area I think Cardigang could improve. I ended up using some troubleshooting YouTube videos from UK knit kit company Wool and the Gang, and they were really helpful.

Would I buy it again?
I definitely would. Knitting my own cardi gave me such an appreciation for slowing down and creating something with my hands. It also gave me some perspective on the time and effort that goes into knitwear—something I previously took for granted. Their kit was really easy to follow, the choice of colours was abundant, and the wool feels so soft and luxurious.
The kits also make an awesome gift (whether you knit the kit yourself for a friend or give them the kit to work on themselves), and they’ve also just released some Christmas jumper kits which are so damn cute.
Cardigang is a great, local, female-owned small business that is making #madebyme fashion achievable and desirable, so I would 100% recommend them. Just make sure you’ve got some troubleshooting plans in place in case you make a mistake (or ten).
I just want to clarify that this is not a paid ad, just an honest review from a happy knitter!
